Thursday, April 28, 2016

A's Selfies

As soon as I spread everything from my May Here & Now Kit onto my desk, I knew that the Paige Evans Patchwork Fancy Free paper was the first to work with. I remembered seeing a bunch of selfies from my daughter on my phone and thought this paper would make the perfect home base for all of those photos.


I printed all of the photos just under 2 X 2 inches so that the paper sections would give a little frame to each picture. This page came together really quickly by adding lots of bits and pieces from the kit to the page along with the photos.


It felt so good to make a page! Enjoyed the process and love that I'm documenting for our family.

Saturday, March 19, 2016

My Sunshine Girl

This month, I've been having fun creating with the Oh Happy Day Scrapbook Circle Kit. The bright, cheerful colors just call to me! Today I'm up on the Scrapbook Circle blog sharing this page about my favorite 11 year old.


My post is all about how to create a custom layout background out of 6X6 paper strips. It's a fun and simple technique that has a nice impact.


Just for fun, I took pictures along the way as this page came together and I've put them together in a little video using the Party, Party app. You'll see that I started out with a different photo, but once I pulled the papers decided to switch to this photo instead.


This page was fun to build and came together quickly!

Happy Saturday to you!

Friday, March 11, 2016

New Scrapbook Circle Creative Team

One of my favorite things about Scrapbook Circle is the opportunity it gives me to get to work with talented and kind people. Starting with our April Kit, we will have a new team of ladies working to bring the best inspiration and I'm excited to be working with them. Here's a look at the new team!


Hope you are excited about this new team. Looking forward to working with all of these ladies!

Tuesday, February 16, 2016

Snowshoes!

Over Christmas break we got away for a couple of nights to play in the snow and enjoy some time away together as a family. We had a great time playing games (King of Tokyo is a new favorite), trying out new restaurants, meeting up with friends, sledding and we even tried out snowshoeing.


We had a fun time trekking around on the snowshoes. We didn't go for a very long time, but I could see that it would get very tiring if we'd set out to walk a few miles.


For a Phoenix girl, this was a perfect adventure with a fun mix of cold and snow. Can't wait to do it again sometime!

Layout Supplies /// Scrapbook Circle Only You Kit 

Sunday, February 14, 2016

Happy Valentine's Day!

Hope your day is sweet with filled with the people you love!


I had some fun putting these tags together with lots of leftover bits and pieces of Valentine themed goodies I've had piling up around here. Now they'll get tied to treat bags and be ready to give out!

Friday, February 12, 2016

Take 14

Looking for a little way to sweeten up this Valentine's weekend? How about picking up a few goodies for yourself while with a nice savings?


Save $14 on your Scrapbook Circle orders over $40 this weekend! Sweet! Use code VALENTINE at checkout.


You + Me: Colored Minty

I've had so much fun playing with paper and photos this past week. It feels so good to have time to make creating a priority right now.

For this layout, it was all about playing with a favorite photo and adding lots of journaling. Those lines on the background paper just called to me to be filled with words!


The You + Me acrylic pieces started out white, but I really wanted to color them to match the frame of the page. I experimented by covering the acrylic with mist (Heidi Swapp Color Shine Mint) and let the color sit on it overnight. The next day the mist was totally dry and had formed a film on the letters. I peeled the film back and the letters were left covered with the beautiful minty color!


For a few finished details on the page, I added mint foil to the heart card next to the photo. Every time I use the Silhouette, I love it! I need to remember to use it more often. I also added a few lines of hot pink stitching near the top to create a base for the banner along the top. I wonder if I will ever tire of banners? Hope not!

Layout Supplies /// Scrapbook Circle Only You Kit /// Date Night Add-on


Monday, February 1, 2016

Love You 3

The Only You Scrapbook Circle Kit for February has a great mix of Valentine bits and pieces and it was perfect for a love themed page about my kids. I feel like heart and sparkles work year round for so many different pages!


Over Christmas break we took a three hour drive from our beautiful Phoenix weather and headed north to play in some snow for three days. On the day we arrived, snow fell all day and it was so peaceful to watch. We cozied up by the fire, read books, played games and had some snow play time too.


Hooray for snow and heart-filled pages!

Layout supplies: Scrapbook Circle Only You Kit /// Date Night Add-on /// Hand Holding Add-on

Friday, January 29, 2016

5 Friday Favs

Today I thought it would be fun to post 5 of my favorite things right now. Ready?

Number ONE: The Nightingale by Kristin Hannah


This book drew me in and I loved every minute of it. The characters were beautifully crafted and the story pulled at my heart. It is the story of a family living in France during WWII and it just felt so real. I have such a deep admiration for people who lived through that war. There were everyday heroes everywhere. Read this and you won't be sorry.

Number TWO: Pure Barre


Back in September a new Pure Barre opened up just 4 minutes from my house and I decided to give it a try. I've been hooked since the first class. They only do classes and they are all so challenging. I feel stronger and more toned. Plus I love that it's small, isolated movements and not an hour pounding on a treadmill.

Number THREE: Magic Cookie Bars

Yes, I've made Magic Cookie Bars multiple times in the past, but I recently made this recipe from Six Sisters Stuff and love the addition of the sprinkles on top. It was just a perfect, playful way to top off one of the most delicious flavor combinations. Make these soon and your family will thank you!

Number FOUR: Stitch Fix

It's been almost three years since I signed up to receive my first Stitch Fix box and I'm still loving it. Each month a stylist sends me 5 clothing items in a box. I keep what I want and send the rest back. This is so perfect for me because I really don't have a lot of time to go shopping. If I do have time, I really don't enjoy it. So this allows me to save time plus try things that I might not have picked up at the store, but discover that I love. There is a $20 per month styling fee that goes toward purchasing anything in the box, so as long as I keep one thing, then I'm not loosing any money. If you are thinking about giving this a try, you can use my referral link that earns me credit. (The credit is absolutely not why I'm posting about this! I really just love this service.)


You can see my most recent Stitch Fix acquisition in the photo above that I wore to CHA earlier this month. I loved the bright floral print on the front plus it is seriously the softest shirt ever.

Number FIVE: Elise Gets Crafty Podcasts


I do a lot of driving and sometimes like to fill my time by listening to Podcasts. One of my favorites is Elise Gets Crafty where Elise talks with creative small business owners about creativity and applying it to a small business setting. She talks with many inspirational people and I love having ideas sparked by these interviews.

Well, there you have it! My first post of 2016. I hope you enjoyed hearing about a few of my current favorites and maybe one of them will spark something that you want to try. Enjoy your weekend!

Thursday, January 28, 2016

8 Ways to Embellish a Page at Scrapbook.com

Did you know that Scrapbook.com offers classes that are totally free, inspirational and fun? In the fall they asked if I'd be interested in going a class for them and I was excited for the opportunity.


It took a month with intense creative time to create all of the content for this class. It was great to have a reason that I had to create every day. Sometimes I just need a little extra motivation to start creating and there's nothing quite like a deadline to add some motivation. I had a great day filming at the Scrapbook.com office. They have a beautiful filming studio and they were all so nice and friendly. It was such a great experience.


I developed a series of eight lessons for my class 8 Ways to Embellish a Page. There are a lot of playful techniques like using wood + mist to create a page background, new ways to use 6X6 paper pads, using washi tape to create tabs and more!


It is so much fun to challenge myself to come up with content for teaching. I love breaking down the creative process and getting to share ideas with others.


Remember the class is totally free. You just need to sign into your Scrapbook.com account and click on the classes link near the top of the page. If you are looking for a little extra entertainment during your crafting time, consider checking out a few of the lessons. Hopefully I can give you a little scrapbooking inspiration!

Sunday, June 7, 2015

The Cut Shoppe + Scrapbook Circle Blog Hop

Hello! I'm excited that Scrapbook Circle and The Cut Shoppe are teaming up this week to bring lots of inspiration and prizes to our readers. We are working with the Scrapbook Circle June Have a Little Fun Kit plus The Cut Shoppe cut files.

Here's a look at what I created.


The title was cut using the A to Z alpha. I placed it my Silhouette software and then made it as big as possible to stretch across the page. I also used the "selfie" and "smile" cuts came from the Captured on Camera file to add a couple of extra accents on my page.


Hop along with our Scrapbook Circle team and comment as you go. You can start the hop over on the Scrapbook Circle Blog. We will be selecting a winner from all of the blog hop comments to receive a $20 credit to The Cut Shoppe Hop. Each comment is another entry, so comment all along the hop!


Be sure to stop by The Cut Shoppe blog and hop along to see what their team created with our June kit. Comment on The Cut Shoppe hop and you are entered to win one of our June Kits!

Hope you find some inspiration today!

Monday, May 18, 2015

Anniversary Blog Hop

It's hard to believe that Scrapbook Circle is celebrating it's 9th anniversary this month. That means we've created over 100 main monthly kits plus many more add-ons and project kits. Good thing I love memory keeping!

Today we are celebrating the anniversary with a blog hop around to the Scrapbook Circle team members' blogs where they are showcasing projects created with the Hello Sunshine Kit. 

Want to take a look at my page? I drew inspiration from my layout from the Pink Paislee Insta Kit that is in the Scrapbook Circle Kit. It included a bunch of frames that perfectly fit together to cover the 12X12 page.


The frames made a great base for adding photos, journaling and few embellishments.


The hop starts at the Scrapbook Circle blog and I'm the last stop along the hop. If you just arrived here, be sure to stop by the Scrapbook Circle blog to start hopping. Comment along your way while visiting our team members' blogs. Each comment will be one entry in a random drawing where we will be giving away FIVE May Hello Sunshine Kits.
I hope you feel inspired today!
Comments close at midnight PST on May 21. We will post the winners on the Scrapbook Circle blog on May 22.
After seeing all of the great layouts, do you feel like you need a May Kit?!?
Scrapbook Circle is offering a FREE past kit with all new May subscriptions this month, so now is a perfect time to try out their kits. With only 2 months commitment to get the discounted kits, you don't have to promise to get many kits. You can find all of the free kit details here.

Monday, May 4, 2015

Epic Story

Hello, hello! Happy Monday to you. Hope that you had a fabulous weekend. One fun thing I did this weekend was participate in the Scrapbook Circle Instagram Round Robin where our team shared layout inspiration using the May Hello Sunshine Kit.  I loved getting to see what the team created with the kit!

Here's a look at the layout I shared:


The inspiration for this page came from all of those gold rimmed tags that are on the page. They were scattered on my desk and the idea of scattering circles on my page sounded like a fun plan. I pulled out a couple of my circle punches and had fun layering the circles and photos on the page.


When I think of the word epic, I think of words like awesome, cool and amazing, so it felt like epic was just right for the title of this page about a weekend away to Seattle with my husband. I've actually already created one page with these same photos, but I has an extra set in a pile on my dest and decided to play with them. You can see my original layout with these photos here.

I love documenting our stories!

Wednesday, April 15, 2015

Three Simple Design Techniques

Playing with paper and photos is one of my favorite things! Today I want to share a favorite recent layout I put together with photos from a visit to the Top of the Rock in NYC.


I'd like to point out three simple techniques I used to help this layout come together.

1. Paper Tearing. I went a little old school with the technique along the right side of the page on the edges of the layered paper strips. Paper tearing adds a nice extra touch of texture and looks great when layered with a stack of papers. The little white edge add an extra touch of contrast.

2. Grid Design. This is a classic way to layout a page. I love using grid designs on my pages because it gives me a place to focus where photos and embellishments are added to the page.

3. Journaling Between the Lines. Looking for lines in patterned paper that can be a guide for your journaling is a perfect place to incorporate your handwriting into the page design. The lines in the paper design help keep the writing neat and straight. This triangle design didn't provide a traditional straight line to write on, but it gave a great space for writing and kept my journaling straight and neat.


Next time you're stumped of how to start a layout, you could give one of the about techniques a try to get you started. I'm sure you'll have a finished layout in no time.

This is the last of the layouts I'm made for now that include photos from our recent girls trip to NYC. As you can see if you've been ready my blog this month, I took a lot of photos! It feels so good to have some favorites printed, combined with words and ready to go into an album.

Layout Supplies /// Let's Do This Kit /// This Way Add-on /// Love It Add-on

Monday, April 13, 2015

Playing Along with Paper Issues

Hello! Hope you've had a fantastic weekend. We enjoyed Hannah's last soccer game of the season, a bit of relaxation and some family time. Now I'm ready for a new week!

This week Scrapbook Circle is sponsoring the challenge over at Paper Issues and I thought it would be fun to play along with the Prints Charming Challenge. You can find out all of the challenge details over on their blog. A Scrapbook Circle kit is up for grabs, so I hope you'll join in the fun.

For my take on the challenge, I decided to mix seven different patterned papers to create this layout. Since some of the prints only show slightly, I think the overall balance of print and color works on this page. I used white cardstock and and this digital cut file to create the random circle cutouts. Adding white to the top of the paper helped to mellow out all of those patterns.


This page is all about a visit to Billy's Bakery when we were in NYC last month. If you look closely in the photo, you will see a vintage floral wallpaper in the background and that is where I took inspiration for the colors and flowers that were used to embellish the page.


It's been so much fun to go through our NYC trip and print out a bunch of favorite photos. One of my favorite things about a trip is getting to relive the highlights once I'm home and scrapbook about them.  


Now one more of our stories is recorded. I love documenting our family stories!

Layout Supplies /// Let's Do This Kit /// This Way Add-on /// Love It Add-on

Saturday, April 11, 2015

Journaling Blocks for Storytelling

It's Saturday! I'm looking forward to checking off several Scrapbook Circle tasks from my to-do list today and then watching my daughter play in her last soccer game of the season. Should be a great day!

Today I want to share one of my favorite quick journaling tips with you. Sometimes getting words on a scrapbook page isn't the most fun part of putting the page together. I've found that when I incorporate a few journaling blocks into the page design, it makes journaling easy because I have a designated and limited place to write.


On this page, it is designed using the rule of thirds to create a nice balance on the page. The top third includes the title, the middle is the photo and a subtitle and the bottom third was reserved for the journaling. I used the journaling blocks from the Scrapbook Circle April Printable on this page, but there are lots of different journaling block options available from a variety of companies.


I love journaling blocks because it gives a defined place to write. When I'm using a limited space like this, I think through what my journaling will be and think about much space that will take. Sometimes I air write just above the space to get an idea of how many words will fit in the space. 


Occasionally, the spacing a little off and I'll have extra room which is great for adding a date or location. If I start writing and it looks like I'm going to run out of space, then I do my best to use less words to tell the story. Or if I really have more that I want to share, then I would find a way to work another journaling block into the page design.

Hope this tip for working journaling onto your page gives you some inspiration for an upcoming layout!

Friday, April 10, 2015

Learn It. Make It. Love It.

Isn't Crafty's tagline perfect for those of us who love crafting and learning new things: Learn It, Make It, Love It.  I'm excited because Craftsy is having a flash sale this weekend where they are offering up to 50% off many of their classes.


My Fast & Fun Scrapbooking Class and my Standout Titles and Creative Journaling Class are both included in the sale!


There are so many other classes that look inspiring. Here's a look at a few that look fantastic to me:

Travel Scrapbooking with Amy Tan

Scrapbook Design and Storytelling with Jen Gallacher

Sweet and Savory Food Gifts with Diana Morgan

Thank You Cards with Kimber McGray

Food Photography with Andrew Scrivani

Okay, there's my list of top class picks. I'm excited to choose a class and learn something.

Teaching at Craftsy was a highlight of last year. I love getting to share my memory keep passion with others!

Thursday, April 9, 2015

Using a Big Photo to Tell a Story

Hey there! Hope your day is going great. Things are good here. I got the kids off to school this morning and decided to try out the 7 Minute Workout App I've had on my phone for months instead of going for a run. I loved it! I'm thinking I'll mix it in with jogging for a hopefully well rounded workout. After blogging, I'm heading out to meet my sister and two cousins at Joyride Tacos for lunch. Love that place. Their veggie tacos are my favorite.

Today I want to share a layout where I used one 8.5 X 11 photo as the background for the page. I think this is a fantastic way to preserve a favorite photo in a scrapbook.


A fine tip sharpie works perfectly for journaling directly onto the photo. This is an easy way to write on a big photo layout so that you aren't covering the photo up with journaling cards or other embellishments where you can write. The "on this day" I used right before the journaling is a rub-on and it went on perfectly smooth right onto the photo.


I intentionally kept the embellishments to a minimum so that the focus would stay on the photo. Making the photo black and white gave a nice contrast to the little pops of color provided by the embellishments.


So there you have it: a big photo layout with a few simple embellishment and another story documented.

Layout Supplies /// This Way Add-on /// Love It Add-on

Wednesday, April 1, 2015

Let's Do This!

I'm just loving the name of Scrapbook Circle's April Kit, Let's Do This. I've been doing a lot of spring cleaning and reorganizing around here the past couple of weeks and I feel like "Let's Do This" is going to be a perfect theme for the month. I'll have to post some pictures of some projects I've been working on around my house. It's mostly involved hanging things on our bare walls. It's so much fun adding some color and personality to our home.

Today I want to share one of my layouts using the Let's Do This April Kit. I had a creative burst last week and created five pages with the kit and I'll be sharing them all here soon.


It was so much fun to put this page together. The word paper in the background is one of my favorites and I wanted to have as much of it show without taking away from the photos and stories. Using some white cardstock in the center seemed like the perfect way to frame my photo and journaling while still letting a lot of the background paper show. Finishing off the page with a sprinkling of sequins added just the right playful touch I was looking for on the page.


This was one of my favorite photos from our recent trip to NYC and I'm happy to have it printed and on a page along with some journaling telling more about our trip.


All of the photos on my NYC trip were taken with my iPhone. I would have loved to have photos from my big camera, but it didn't seem worth it to carry that weight around the city with me. What do you think? Should a big camera go along on vacations or do the phone photos work for you?

Layout Supplies /// Let's Do This Kit /// NYC alphas from my stash (Pink Paislee Bella Rouge)

Monday, March 23, 2015

Our Top 10 in NYC

Last week my daughters and I went along with one of my friends and her three daughters for a few fun filled days in New York City. We did lots of walking (over 33 miles), lots of treat eating and lots of site seeing. We've compiled a list of our trip favorites that I thought I'd share.

So in no particular order, here's a look at many of the highlights from our vacation.

1. Walking through Central Park.


Okay, this might not be surprising since NYC is famous for Central Park, but it really is a fantastic place. There was some snow on the ground and it was really beautiful. There was a street performance and one of our girls got to join in which was really fun. We took lots of photos at a variety of places. Lots of fun places to pose.

2. Treats at Levian Bakery and Billy's Bakery.


If you only get one treat in NYC, it must be at Levian Bakery. Their chocolate chip walnut cookies are a true taste of heaven. They are huge and should probably be shared, but we didn't want to take any chances, so we each ordered our own cookie plus an extra just so we could snack on it throughout the day. This is pretty close to the Natural History Museum, so after a stroll through the museum, I recommend a quick walk to get a cookie.


Our second favorite treat was the banana cake at Billy's Bakery. It was a very generous slice. Bonus about Billy's is that there are two tables where we were lucky enough to sit down and warm up white we enjoyed our treat.

3. The Views from Top of the Rock. We picked up City Passes for this trip and it included trips to the top of both the Empire State Building and the Top of the Rock. We decided that we liked the Top of the Rock best because of the entertaining elevator ride up. It's a glass top elevator and you can see all the way to the top. Plus there was a laser light show and music playing on the way up. The Empire State Building had two different elevators you have to take to the top and lines at both elevators.  The views from the Top of the Rock were fabulous!


4. Visiting the Brooklyn Bridge. This iconic spot in NYC did not disappoint. Great view and a beautiful bridge. It's near Battery Park (place where you catch a ferry to Liberty Island) and the 9/11 Memorial, so it's a perfect place to visit if you are on the south end of the island.


5. Late night Greek Food Truck. There are lots of Greek food trucks in NYC, but my sister swears the one of 6th Ave between 23rd and 25th street is the best and we didn't want to take any chances. We went here about 11pm on our second night of the trip after seeing Matilda. I got the combo which was a styrofoam container filled with rice, chicken, gyro, french fries and topped with tzatziki sauce. This was probably my best meal while in NYC. This truck caters to the late night crowd and doesn't arrive until around 10pm, but stays until 4am. 


6. Strolling through Highline Park. Unused elevated railroad tracks have been converted into a park with a great walking path in the Chelsea area. It was really col when we were there, but in better weather this would be the perfect place to take a picnic and relax. There is seating all along the walking path. When we were there a few years ago, a magician street performer was there and he was really fun to watch. 


7. Everyone agreed that the BEST thing we did on this trip was to climb to the crown of the Statue of Liberty.  We purchased the tickets online a few months before our trip. They only let a very limited number of people up into the crown every hour, so if you want to go, plan ahead. The climbed up a very step and narrow spiral staircase all of the way up inside of the Statue of Liberty. Our group of seven barely fit up in the crown. We had a great city view from the crown. It was really amazing to see the inside of the statue - it's still copper color since the elements haven't oxidized it. Add this to your must do list!


8. New York City Public Library


9. Seeing Les Miserables.


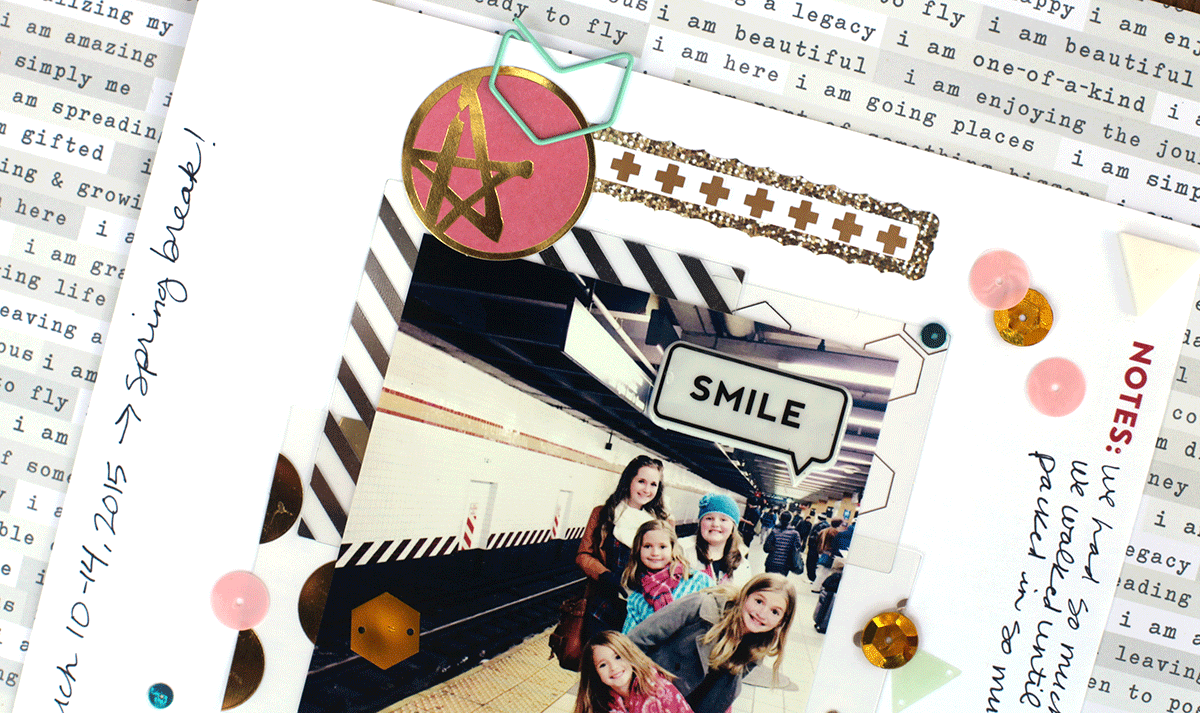
10.  Riding on the subway. You've got to ride the subway when in NYC, right?  We were probably the only people posing for pictures while waiting for the train to come, but we're tourist, so why not? We bought an unlimited pass that was good for a week, but I think we could have saved some money by buying the 8-ride pass because we didn't end up using the subway as often as we thought we would. We only got on a train going in the wrong direction once, so I'd say we did pretty good navigating. Before the trip, I downloaded the Hopstop app and it was amazing for getting us to where ever we wanted to go. You just put in where you want to go and the app will tell you you options for getting there. It will tell you exactly which subway trains to take or which walking path will be best. Definitely something you'd want to have for navigating around the city.


There you have our top 10! 

We also went to the Natural History Museum, saw Matilda, walked though Chinatown and Little Italy, visited the 9/11 Memorial and Museum, ate at Shake Shack, looked around the American Girls Store, Toys R Us and FAO Swartz, went to Chelsea Market and enjoyed banana pudding at Magnolia Bakery. Yes, we squeezed a lot into three and a half days. The only two things on our list we didn't get to were ice skating in Central Park and enjoying some frozen hot chocolate at Serendipity. We'll just have to go back someday to check everything off of our list!

I'm so thankful I got to share this adventure with our daughters and friends. I'm hoping this is a trip they will always remember.


LinkWithin

Related Posts with Thumbnails

ShareThis